Thursday, February 24, 2011

How To Series 1: Thread Painting 101 - Review and Wrap Up

What an exciting adventure this has been!  I have had so much fun sharing with all of you, and reading the feedback from emails and comments sent.  This has hopefully given you the tools needed to begin your own Thread Painting journey.  My hope is that by taking things one baby step at a time, Thread Painting would be less of a scary mystery that only 'advanced sewers' can do, and more of a fun learning experience that anyone can participate in and grow from. 

This has been a learning experience for me as well!  In the past I have had a blog and posted to it maybe twice a year... maybe.  Blogs have come a long way since then and when I started this one I had to essentially re-learn it all.  I am glad I did though, this has really been a rewarding experience for me!

Combining Stitches

Before we end this series, I wanted to show you some examples of combining the stitches we have learned.  While many of the pieces I have done use only one type of stitch, Thread Painting is extremely effective when the different stitch techniques are combined.


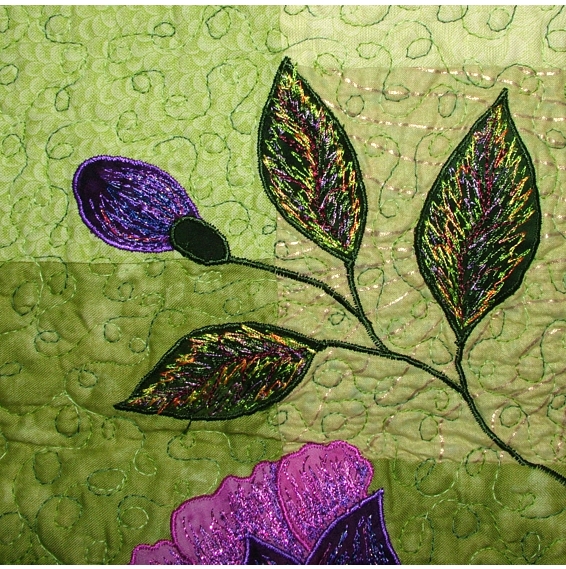
In the Hummingbird and Fuchsias quilt, the leaves and parts of the flowers use a directional zigzag stitch, while other parts of the flower and the buds use a directional straight stitch in order to emphasize the shape.

The Sunflowers detail shown below uses a combination of the directional straight stitch, directional zigzag, and zigzag meander on the petals, as well as zigzag meander and straight stitch detailing on the leaves.


In this detail shot of a vest I made years ago, the pansy flowers use both the meander zigzag and the directional zigzag stitching.  Notice the leaves use the directional zigzag to applique them, giving them a more feathery look.


And finally, this Lily was done using fabric paint and then Thread Painted.  A directional straight stitch and a directional zigzag were used.  The stamen details were also added using a very dense directional zigzag stitch.


Calling for Your Input

Have you been practicing your Thread Painting?  I'd love to see what you've been working on and I am sure everyone else would too!  If you have played with the Thread Painting techniques on a project or practice piece, I'd like to post some photos right here on the blog.  So finish up those projects, or even a Work In Progress  and send a .jpg file along with what you used and where and we will get it up on the blog.  Do you have questions or need advice or clarification on something?  Send those too and I will try to answer as best as possible.  Pictures are worth a thousand words, so try to send a picture ( in a .jpg format please) along with your questions, comments, or success stories. How to get in touch with me?  Click here to Email me.

Whats next??

That is my question...  I plan on sharing what I am doing in the studio, whether it is a pattern or project in progress (I have several of those going!) or just Fun Stuff that I come across or am playing with or learn about.  But what I'd like to know is what do you want to see?  Let me know!


A Great Big Thank You!

I want to tell you all Thank You for all the support, the encouraging words, for sharing the link here and for just plain reading and learning from this series.  I can't tell you how much fun I have had interacting with all of you!

Angela R McIntyre
Laughing Cat Designs

Thursday, February 17, 2011

How To Series 1: Thread Painting 101 - Directional Straight Stitch

We have learned about the proper tools and correct supplies, how to Thread Paint using a basic meander zigzag, add detail with a basic straight stitch, and last week we learned how to expand on the zigzag stitch by using it directionally.  However, there are times when a piece needs to be thread painted, but the zigzag stitches just don't fit in with the feel of the piece and it needs a bit more than detail work.


Directional Straight Stitch

I call this a directional stitch because it uses a very purposeful direction in the stitch in order to get the look we are after.  With this stitch we can accomplish both painting with thread to apply the colors we want, and control the shape and add motion to the piece.  As with the detail lines, we use our 'S' curves rather than a straight line.  By adding many more lines of stitching we build up the thread painting adding color just as we did with the zigzag stitching.  Remember that these lines are not always an S but they always have at least a bit of a curve in them.  This will help to shape our pieces and give them a more natural appearance.  


Straight Stitch Thread Painting 

In some cases, we don't really want to build color up from shadows as we have in the past, but just to add color to liven up a piece.  In the sample below, the color additions liven up the foliage. Most of the time we backtrack along the stitch line and then branch off for more stitch lines. I can also carefully travel a few stitches along a seam line or the base of the applique piece to the next position, and then continue Thread Painting.  Another method, especially useful when many lines of stitching are on a piece, is to not quite follow all the way along your stitch line when backtracking and end up an eighth to a quarter of an inch away from your start point.  These techniques allow you to travel along an applique piece without it being too noticeable.


Adding Motion

By adding long lines of thread painted color, we also add motion to our pieces. In the case of the Flower Bowl below, we have room to add long curvy lines to give the effect of a flower petal that has curve and flow.  Notice some of the darker contrasting thread colors that emphasize these curving lines.


Building Color

Our colors are built using the same methods as before, we are just using the straight stitch.  Add your cool tones and shadows first, working your way up through mid tones, and then lights and highlights.


Homework: Play with this expanded version of the straight stitch and practice building color and thread up.  Remember to practice traveling and the S curve.

Next week - Final Installment

Examples of combining stitches, and a review of what we have learned in this series.

Friday, February 11, 2011

How To Series 1: Thread Painting 101 - Directional Zigzag

The key to successful Thread Painting is Practice, Practice, Practice!  Have you been practicing your Thread Painting?  Now that we have the basics covered, it is time to expand on the stitches we have covered.  In the first Thread Painting stitch, zigzag meander, we used a zigzag stitch to apply thread color to where we wanted it.  With this new stitch we will be a bit more deliberate about where we apply our color.  In the quilt below, Hummingbirds and Fuchsias, much of the Thread Painting done on the applique pieces was a directional zigzag stitch.

Hummingbirds and Fuchsias

Directional Zigzag

The reason I call this a 'directional' stitch is because we are not just meandering but rather stitching in a specific direction to get a specific result.  The stitch is done by setting your machine to a medium width zigzag, feed dogs lowered of course, and stitching from side to side.  No moving all around, we always move side to side with only a very slight forward or backward motion in order to stitch the areas we need to cover. 


This stitching can be done very lightly for touches of color, on up to very heavily stitched pieces that look almost machine embroidered.  This is in fact the stitch we use for Free Motion Embroidery.  When we stitch heavier we need a bit of extra stabilizer, as this stitch tends to pucker a bit more than the meander or simple straight stitch detailing.  On the 'Hummingbirds and Fuchsias' quilt above, I used two layers of Stitch n Tear, and left the stabilizer under my applique pieces while I Thread Painted.  Once I was done I removed it from around the pieces, and ironed with steam using a pressing cloth.

Practice

Lets practice the stitch.  Layer a practice piece of fabric onto a stabilizer.  You can use two layers of stitch n tear or a piece of the Decor Bond.  Since we are just practicing, it is nice to have the extra stabilization to make it easier to stitch.  This can always be adjusted depending on the project you are working on.

Place your hands on either side of the fabric and begin stitching.  Slowly move side to side, a few inches at a time.  Try a a bit of a meander in your side to side stitching by moving slightly forward and backwards and back and forth as you create a line of side to side stitching.  Play with the stitch, moving slower while your machine stitches faster, and then switch to moving a bit faster with a slower stitch speed.  Pay attention to your results. Now cover a smaller area, concentrating on building color.  Alternate the length of your side to side stitch; this will be essential to blending and a more natural look. 


Rotating and Pivoting

Sometimes we need to rotate or pivot when we apply color with the directional zigzag.   This is done by always returning to our 'center point' before pivoting to a new direction.  In the Pansy below, the center point of the flower pieces is at the base of each petal.  Along the leaves the center is the vein line.


Building Color

Now that you have the feel of the stitch, lets Thread Paint a basic leaf shape using the Directional Zigzag stitch.  As with the basic Meander Zigzag, we stitch our colors in order starting with shadow and cool tones, then the mid range colors, and finally highlights and warmth.  Each of these can have as many colors as it takes to get the effect desired.  There are always exceptions to the 'rules' however.  In the Pansy above I was concentrating more on adding color to the flower than adding the basic shadow/mid range/highlight.  Those basics are in there, but in order to get the coloration I wanted I 'broke the rules' so to speak.


To keep this simple we will use just three colors.  One shadow, one mid range, and one highlight.  Remember that these three basic colors can also be variegated.  This will give the look of having added much more thread color than we actually did!  I chose a very muted green fabric so that you could see the thread work a bit easier as well.

Start Stitching

Machine applique a basic leaf shape to a background fabric, using two layers of stitch n tear or a piece of decor bond as your stabilizer.  Try to make a slightly larger leaf, so that you have room to actually practice.  On the leaf, trace a line for the center vein using a chalk marking pencil.  Now mark directional lines as shown.  These lines will give you a guide as you begin stitching so that you will know both where to stitch and what direction.


Shadows/Cool

Begin stitching along one side of the vein with your cool color.  On my leaf I am using my favorite muted dusty purple to add cool.  Stitch side to side, always stopping along the center vein line but varying the length of the stitch line on the other side.  Pivot as needed along the vein line to keep your stitching fairly parallel to your guide lines.


Mid-range

Now switch to a medium tone, I used a nice green that went well with my leaf color.  Stitch around the cool tone on the one side, carefully pivoting at the tip of the leaf, and then stitch along the vein line down the other side.  Remember to blend into the shadow/cool area.


Highlight

For my highlight color I am using a warm variegated yellows/oranges thread. This will do two things, it adds warmth and highlight at the same time, and it will help you to see the difference in the stitching for our example photo.  Stitch along the edges of the leaf as shown, and then add just a bit to the middle of the mid range area.  This creates kind of a visual 'bend' in the leaf by bringing that portion a bit more forward.


I use this same basic method for the flowers and birds in the Hummingbirds and Fuchsias quilt, and for the pansy applique.  In the photo below, the Leaf Bowls used the directional zigzag stitch over the entire leaf and many more colors are used.  You can see how building up your colors really makes a difference in the overall look of the finished piece. *Note - the Leaf Bowls (and the Flower Bowls) use a much heavier stabilizer called Fast2Fuse Heavyweight in order to give them the heft they need to become 'bowls'.


Homework:  Practice, Practice, Practice!  Play with different shapes, leaves and flowers and such, and use the Directional Zigzag stitch.  Build multiple colors up to achieve a painterly effect.  And absolutely have FUN with it!

Next Week:  Straight Stitch II - Thread Painting with a straight stitch.

Revisit this basic technique and play with more directional stitching in Straight Stitch Thread Painting.  Achieve a completely different look to your thread painted pieces.  Oh the things you can do with a straight stitch!

Thursday, February 3, 2011

How To Series 1: Thread Painting 101 - Basic Straight Stitch

Last week we learned how to implement a basic Thread Painting stitch with the Zigzag Meander.  I hope you did your homework and played with the different color threads and how the meander stitches out on the zigzag setting.  For me, threads are the addictive part, there are so many colors, so many possibilities!

Now that you have the feel of this basic Thread Painting stitch, we can add to it.  Lets look at our leaf from last week.  There seems to be something missing, doesn't there?  Our leaf needs a bit of detailing to bring it to life; we need to add vein lines!


Directional Thread Painting: Basic Straight Stitch

While the name is a bit misleading, the basic straight stitch used as a thread painting stitch can add quite a bit of detail to our work.  As the leaf above stands now, we have basically added color, but not yet created a stunning fall leaf.  Using this leaf as an example, adding vein line details we effectively pulling together all the thread painting we have done and making it not the focus, but rather a part of the whole piece.

Straight Line vs. S curve

When we add our detail lines, in most cases we use an 'S' curve, rather than a nice straight line.  Especially when mimicking nature. Now this is a guide, rather than a rule.  In some cases a highly stylized design may call for straight lines.  For what we are doing however, a nice natural S curve will give us the effect we are after.  Shown below is a diagram of our leaf using straight lines to add the veins.  See how unnatural they look even on our stylized simple leaf shape.


Now see how adding a curve to our line detail gives our leaf a more natural appearance.


These lines do more than just add detail, they also help to give the leaf shape and movement.  Especially when added to a Thread Painted leaf that uses shading and highlighting to add dimension. 

Here we have examples of using an S curve on the Flower Bowl.  The soft S curves in the line detail help to add shape and movement to the flower petals, bringing them to life.


This bowl was thread painted entirely using the straight stitch.  It uses the same method as for the meander stitch (shading, mid tones, color pop, highlights) and really shows what a simple straight stitch can do.


In this detail shot of the Sunflowers sample, the leaf was thread painted with the meander stitch using shading, mid tones, and highlights plus a metallic and then veining detail was stitched. 

The 'S' Curve

Not always an S but always curvy, sometimes we have to change up the look of our lines so they wont all start to look the same.  Reversing the S, adding more or fewer curves, and accentuating or lessening the curves in this S shape will help you to blend and shape.  Practice making S curves and variations on a sample piece of fabric backed with stabilizer.  Just Play.

Backtracking

Lets add that veining detail to our leaf.  Just like in free motion quilting, we sometimes have to backtrack along our stitch line in order to add another line.  Instead of stopping and starting again, we create our initial line and then reverse and stitch back along that same line until we are at the point where we want to add another line.  Note that we are not using our back-stitch or reverse button!  Simply stopping, pausing, then stitching back along the line you just stitched.  Go slow and careful until you are familiar with the feel of the stitch.  Then if you like, you can try speeding up a bit to a comfortable speed.


To begin we will do a very basic veining detail. Notice that I have turned the leaf upside down in relation to how it faces me.  I like to see where I am going first, then I can backtrack much easier.  It is a visual thing for me. 


Stitch the main vein line down the leaf, remembering to use your S curve, and stop at the top of the leaf.


 Backtrack just a bit, and stop.


Now begin smaller secondary veins, stopping at the ends and backtracking to the main vein line. It doesn't have to be perfect. Repeat this all the way down the vein, continuing to backtrack down to the next point at which you want to add a secondary vein.


Continue in this manner until all your secondary veins are stitch, ending at the base of the leaf.  Lock your stitch and trim any tails.  Now that you have learned the basic method of adding these veins, take things a step further and add more veins off your secondary veins, and so on.


 Using a bolder or stronger color will help your detail work stand out more.  Variegated threads add even more color, and metallic threads will give it a touch of glitz.

Homework: Practice the basic S curve, adding in variations in size, curves, etc.  Also practice backtracking along the stitch line to create veins or secondary stitch lines.

Next Week:  Directional Zigzag Stitching

Learn another technique using the zigzag stitch for more texture and even more dimension to your applique pieces.

Thursday, January 27, 2011

Ho To Series 1: Thread Painting 101 - The Basic Stitch

The Beginning...

My adventure in Thread Painting started with some machine applique leaves.  I had been working on a fall leaf wall quilt, when I realized my leaves looked nothing like the gorgeous full of color leaves outside my window.  My kids were bringing me fallen leaves to trace and to match fabric.  They were younger at the time, and before long I had a giant pile of leaves on my table!  I began to realize that none of my fabric could compete with the real thing, and that to get those colors onto my leaves I would have to use the decorative threads.  With some trial and error, and experimentation with different combination's, I finally had it: Thread Painting.


This is a much later version of those leaves with the basic thread painting stitch, but the technique is the same.  The main difference is I am using better threads on both the top and bottom.  You can also see that I have added embellishments to the leaves.  By using this basic stitch on my leaves, I was able to transform a 'nice' applique into something 'WOW'.  My entire focus on quilting and threads changed in that week of experimentation and I have never looked back!

The Basic Thread Painting Stitch: Zigzag Meander

The basic Thread Painting stitch is really just a simple free motion zigzag.  Our goal is to add color where we want it and by using a zigzag stitch we can achieve a painterly effect with our threads without much fuss.  I use this stitch to add color, but also to shade and highlight. 

Machine Settings

Before we start Thread Painting, we first need to set our machine up right. Lower your feed dogs, attach your free motion embroidery foot, and insert an Embroidery or Topstitch needle.  You should have bobbin thread in the bobbin, and a decorative embroidery thread in the needle. Check your machine's tension; every machine is different so we will start with the basic mid-range setting for your top tension.  We will adjust this as needed once we start sewing. 

If you can, adjust your presser foot pressure to zero or as high as it will go.  This will help prevent any drag with the foot, allowing you to stitch with ease. 

Set your machine to a medium width zigzag (on my machine this is about a 3 wide setting) and because we are free motion stitching our stitch length will not matter.  A mid range width on our zigzag is a good place to start.  This can be adjusted depending on what you are working on, but for most things and to start out this is a good setting.

Before you start - close your eyes, take a deep calming breath, roll your sholders forwards and backwards and release all your tension.  Relax. Open your eyes; you are now ready to begin.

Begin to Stitch

To start, lets use a practice piece of fabric with a tear away stabilizer in back.  You don't have to bother with an applique piece unless you really want to.  We really just want to get the feel for the stitch.  Place your hands on either side of your fabric. (*tip: use only your fingertips to move the fabric around. Your fingers have finer motor control than your entire hand and arm)  Begin to stitch slowly, moving the fabric slowly and smoothly under the needle.  Don't worry about what it looks like at this point.  For the moment we are just getting used to the feel.  Move the fabric forwards, backwards, side to side, all around in a meander.  If you feel comfortable, increase the speed of your machine and continue to move the fabric smoothly and slowly under the needle.  It is important to not jerk the fabric around under the needle.  These too quick movements will lead to broken needles.  Relax, remember to breath and blink.  (This is something I do and always have to remind myself: Breath! Blink!) 

Pay attention to your Tension.  Ideally we want only our embroidery thread to show on the top.  This means that on the back of your piece you will see bobbin thread AND embroidery thread.  The top thread will pull to the back, and that is OK.  If you see bobbin thread on the top of your piece, you need to lower your tensions.  The smaller the number on your tension dial or display, the lower the tension.  Lessening top tension will allow the thread to pull more to the back.  *In some of the Bernina machines, there is a special hole in the bobbin hook for the bobbin thread to go through, increasing  your bobbin tension for free motion work.  In order for any thread painting to work in these machines, this needs to be threaded correctly. 

notice the bits of colorful embroidery thread on the back

Now that we have adjusted our tensions and gotten the feel of the stitch, lets look at our results.  When we move forward and backward our stitch looks rather like this:

Forward and backward                                  produces a zigzag stitch
In this diagram, the straight lines represent the direction of the stitch with the resulting stitch shown next.  Once in a great while I use this forward/backward motion, but for the most part I don't want it to LOOK like a zigzag stitch.  What we really want is a nice meander, which 'confuses' the real stitch pattern and simply applies color in many stitches of thread.  This meander or stipple stitch looks something like this:

meander motion                                     meander thread painting
When applied to an applique, the results are much more apparent.

meander motion results
forward/backward motion results

Multiple colors can be layered to create shadow and depth, color pop, and highlights.  Start with your shadows and dark colors, working your way up to highlights.

solid threads
Using variegated threads can add quite a lot of color pop.  I love to use these threads to add multiple color hues at once, to blend and transition colors, and sometimes to add that bit of zing to a piece.  They tend to blend themselves into a piece better, without being extremely stark.  Play with the different variegated threads, their results will surprise you.

variegated threads
Rarely do I use only one or the other type of thread.  The best results are obtained by using a combination of both.

Homework: Practice, Practice, Practice!   Play and have fun with this basic Thread Painting stitch.  Experiment with the meander stitch motion, different threads and colors, and blending.  If you want to practice on the leaf shown in this tutorial, I have created a small PDF file for you to download.  It has some very basic instructions for fusible and machine applique. 

Next Week: Directional Thread Painting - Straight Stitch

Directional Thread Painting means we will stitch in specific directions to get a specific look.  This can be done with both a straight stitch and a zigzag stitch.  To get a feel for the directional stitch we will start with the Straight stitch.  You'll be amazed at what you can do with a straight stitch!  See you next week!

Thursday, January 20, 2011

How To Series 1: Thread Painting 101 - Supplies Part 2

Last week we began talking about the proper supplies for Thread Painting.  Now that we have the correct machine feet and needles ready, it is time to talk about Thread, Bobbin Thread, and Stabilizers.  Remember, it is important to start with the correct supplies in order to be successful in our Thread Painting adventures!

'Sunflowers'

While this tutorial is not an advertisement for any other company, I have included the names of several brand names that I like and use daily.  What I am giving you here is my 'formula' if you will, that I use to get the results you see in my work. These are the supplies and brands that work best for me.

Decorative Embroidery Thread:

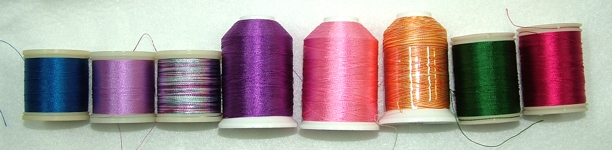
Because I am a Thread-a-holic, I have a TON of thread in my thread stash.  Show me a pretty thread and I cannot resist!  I love to try out new threads and am always on the lookout for the unusual or for the 'perfect' color thread, which changes constantly depending on what project I am working on at the moment.  There are many different types of thread and for Thread Painting we will be starting with a basic Embroidery thread.  The two main types of embroidery thread are Rayon and Polyester.  Both are very shiny with a huge range of colors.  We will talk about these first, and then later in the series when we have gotten the basics down, we can get into Metallic and Specialty threads.

Rayon embroidery threads are shiny, colorful, fairly colorfast, but not very strong. Since they are meant to be decorative and not hold things together (IE: a seam on a garment) they work very well for decorative embroidery.  Some of my favorite brands of Rayon thread are: Robison Anton, YLI, Madeira, and WonderFil.


Polyester embroidery threads are also shiny, colorful, very colorfast, and very strong.  While I don't sew my seams with this thread, it is good to know that the Thread Painting I do will hold up to the test of time, wear, and light.  They are also much less troublesome in the machine than rayon threads.  Since it is a stronger thread to begin with and usually less lint (and therefore drag on the needle), there is less shredding and breakage.  My favorite brand of Polyester embroidery thread is by far Superior Threads.  In fact I will reach for this thread before any other brand when I am thread painting.  I also have in my thread stash Isocord, and Hemmingworth.  Because a polyester thread will melt at higher iron temperatures, keep a pressing cloth on hand to cover your work with when ironing, and try to iron from the back when possible.


Spool vs. Cone

Embroidery threads come wound onto a spool or a cone and both come in various sizes.  These are wound differently and need to be 'unwound' differently as well.  How the thread feeds into your machine will affect how it sews onto your fabric. A spool is usually wound straight and should have the thread coming off the side of the spool.  Cones are cross wound (note the direction of the thread on the cone) and need the thread to come off the top of the cone.


When thread is pulled off a spool or cone incorrectly, it causes it to twist more and that can lead to tension and breakage issues.  Since all machines are different, there are a few adapters out there that can help you adjust the way your spool or cone feeds into your machine.  A spool adapter will help with machines with vertical spool holders, allowing thread to be pulled off the spool from the side.  Slip the open end onto the spool holder with the little notch on the end facing up to keep the spool in place.  Cone adapters will allow the cone to sit upright while pulling thread from the top.  These adapters usually sit behind or to the side of your machine.  Sometimes my thread wants to 'puddle' off the cone too quickly causing problems with tangling and twisting.  A thread net helps to tame these unruly threads without adding a lot of additional tension.  I also use thread nets to store some of these more unruly threads.


Thread Net
Bobbin Thread:

Bobbin thread refers to a 60 - 65 weight two ply polyester thread used in the bobbin when embroidering.  Since your top threads will pull to the back (more on this later on) so that your bobbin thread doesn't show on top, you end up with much more thread on the back of your piece.  In order to keep this bulk down, and also to help form nicer stitches, we use a bobbin thread.  While there are several types of bobbin thread, and I have tried out any and all I can get my paws on, I now only use one bobbin thread: Bottom Line by Superior Threads.  At this time they are the ONLY company that manufactures an excellent quality bobbin thread in a huge range of colors.  While I tend to keep with a fairly neutral color pallet for my bobbin threads (OK, I'm lazy and don't like to keep changing my bobbin!) this range of colors comes in extremely handy.  Shown here is my pallet of bobbin threads. A light grey, medium grey, pink, deep red, green and a beige tone are what I use most often.


Stabilizers:

Have you ever tried to do a zigzag stitch on a plain piece of fabric?  Remember how the fabric puckered up into that zigzag stitch and everything distorted?  Well the same thing will happen when we Thread Paint unless we use some sort of stabilizer.  I have three main ways I stabilize, with other variations we will get into later on for special techniques.  A Tear Away stabilizer (I use Pellon Stitch n Tear) can be partially removed after stitching is done.  You can't tear it out from an area that is heavily thread painted, but you can remove the excess from around it.  I use this stabilizer when doing fusible machine applique.  Once my applique is finished, if I am not heavily thread painting I remove the stabilizer from under the applique piece.  The stabilizer surrounding the applique is left, creating a sort of 'hoop' around the area to be thread painted.  If I do plan on heavily thread painting, I leave the stabilizer under the applique for additional support.  The piece is thread painted and then the outer areas of stabilizer is removed.


When I thread paint really heavily on an entire piece, on or off my applique designs, I use a leave in heavy weight stabilizer.  Decor Bond is my first choice here because it has a built in fusible on one side, allowing me to fuse it to the back of my piece.  Because it is fused (notice the shine on the sample below) my fabric is now completely stabilized, plus I dont have to worry about my fabric moving around or loosing my stabilizer before I begin stitching.


If I want to keep my piece light weight with no stabilizers, such as on a sheer fabric or a wearable, I use a hoop.  These are not hoops you do cross stitch on.  These hoops are made to go under the machine and fit under your machine's foot.  For light to medium light thread painting, a spring hoop will work very well.  For heavier work, use a wood hoop.


Next Week:

By starting with the correct supplies and knowing why these specific items work better, you will hopefully have a much more successful start to Thread Painting.  And, now that we have covered the basic list of supplies, we can start actually Thread Painting!  Don't worry, we will take this in baby steps so that you can practice and become familiar with each kind of stitch before moving onto the next one.  First up: Basic Thread Painting Stitch - Meander Zigzag.  This is the easiest stitch to start with and will let you get used to the feel of free motion zigzag while playing with color.  See you next week!

Be sure to visit my website: www.LaughingCatDesignsEtc.com