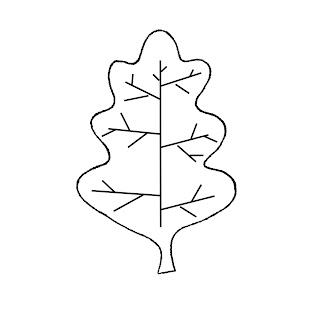
Now that you have the feel of this basic Thread Painting stitch, we can add to it. Lets look at our leaf from last week. There seems to be something missing, doesn't there? Our leaf needs a bit of detailing to bring it to life; we need to add vein lines!
Directional Thread Painting: Basic Straight Stitch
While the name is a bit misleading, the basic straight stitch used as a thread painting stitch can add quite a bit of detail to our work. As the leaf above stands now, we have basically added color, but not yet created a stunning fall leaf. Using this leaf as an example, adding vein line details we effectively pulling together all the thread painting we have done and making it not the focus, but rather a part of the whole piece.
Straight Line vs. S curve
When we add our detail lines, in most cases we use an 'S' curve, rather than a nice straight line. Especially when mimicking nature. Now this is a guide, rather than a rule. In some cases a highly stylized design may call for straight lines. For what we are doing however, a nice natural S curve will give us the effect we are after. Shown below is a diagram of our leaf using straight lines to add the veins. See how unnatural they look even on our stylized simple leaf shape.
Now see how adding a curve to our line detail gives our leaf a more natural appearance.
These lines do more than just add detail, they also help to give the leaf shape and movement. Especially when added to a Thread Painted leaf that uses shading and highlighting to add dimension.
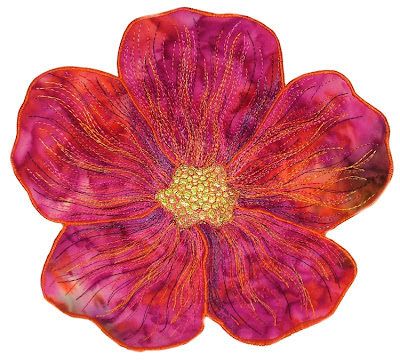
Here we have examples of using an S curve on the Flower Bowl. The soft S curves in the line detail help to add shape and movement to the flower petals, bringing them to life.
This bowl was thread painted entirely using the straight stitch. It uses the same method as for the meander stitch (shading, mid tones, color pop, highlights) and really shows what a simple straight stitch can do.
In this detail shot of the Sunflowers sample, the leaf was thread painted with the meander stitch using shading, mid tones, and highlights plus a metallic and then veining detail was stitched.
The 'S' Curve
Not always an S but always curvy, sometimes we have to change up the look of our lines so they wont all start to look the same. Reversing the S, adding more or fewer curves, and accentuating or lessening the curves in this S shape will help you to blend and shape. Practice making S curves and variations on a sample piece of fabric backed with stabilizer. Just Play.
Backtracking
Lets add that veining detail to our leaf. Just like in free motion quilting, we sometimes have to backtrack along our stitch line in order to add another line. Instead of stopping and starting again, we create our initial line and then reverse and stitch back along that same line until we are at the point where we want to add another line. Note that we are not using our back-stitch or reverse button! Simply stopping, pausing, then stitching back along the line you just stitched. Go slow and careful until you are familiar with the feel of the stitch. Then if you like, you can try speeding up a bit to a comfortable speed.
To begin we will do a very basic veining detail. Notice that I have turned the leaf upside down in relation to how it faces me. I like to see where I am going first, then I can backtrack much easier. It is a visual thing for me.
Stitch the main vein line down the leaf, remembering to use your S curve, and stop at the top of the leaf.
Backtrack just a bit, and stop.
Now begin smaller secondary veins, stopping at the ends and backtracking to the main vein line. It doesn't have to be perfect. Repeat this all the way down the vein, continuing to backtrack down to the next point at which you want to add a secondary vein.
Continue in this manner until all your secondary veins are stitch, ending at the base of the leaf. Lock your stitch and trim any tails. Now that you have learned the basic method of adding these veins, take things a step further and add more veins off your secondary veins, and so on.
Using a bolder or stronger color will help your detail work stand out more. Variegated threads add even more color, and metallic threads will give it a touch of glitz.
Homework: Practice the basic S curve, adding in variations in size, curves, etc. Also practice backtracking along the stitch line to create veins or secondary stitch lines.
Next Week: Directional Zigzag Stitching
Learn another technique using the zigzag stitch for more texture and even more dimension to your applique pieces.


It is so nice that you are sharing these lessons with us. Thank you for helping to take the mystery out of threadpainting!!
ReplyDeleteThank you Angela! Your instructions are so clear and easy to understand. I really appreciate that you are sharing your expertise with us all.
ReplyDeleteHi there,
ReplyDeleteanother good reason to draw the veins in the direction you have done is because then they 'grow' naturally from the stem to the tip and so are more realistic.
I have been pointing my Machine Embroidery students to this series. Thanks so much.
Sandy in the UK
This is terrific. I would like to know why you choose the open toe foot and what threads you use. The tute is clear and well done.
ReplyDeleteThis is great, thank you!
ReplyDeleteThis is the best tutorial I've ever seen about threadpainting! Thanks for sharing! Györgyi
ReplyDeletewww.angelpatches.blogspot.com
Thank you! I'm learning so much through this series of tutorials.
ReplyDeleteThis comment has been removed by a blog administrator.
ReplyDelete